Chapters

 Welcome to Kaiser-Imperium
Kaiser-Imperium is a free, turn-based medieval strategy game. You rise from a humble beginning to the most powerful Emperor by growing an economy, feeding your people, researching technology and waging war for land.
This manual is the complete reference: every mechanic and every number that matters. All values in green (like 500 gold) are the numbers this round is actually being played with.
Your turns refill around the clock on their own. Building, researching, trading, training and launching attacks cost no turns, you do those freely in between. Only ending a turn spends a turn and simulates time: troops march and fight, buildings produce, your people eat and grow, taxes flow in, your military demands its pay and your labs research. For the league table at the round's end, land is not the only thing that counts: every rank-up scores points (the King and Emperor ranks especially), and holding the best research in an area earns bonus points too.
 League & Season
Kaiser-Imperium is built on fairness: nobody is unbeatable just because they started years ago. Play is split into a yearly league made of many league rounds.
How the points add up: every rank you reach is worth 150, and the top two ranks add big one-off bonuses: King (rank 18) +100 and Emperor (rank 19) +250. Each of the 9 research areas in which you hold the highest value earns 50, and your land counts at a tenth of its normal point value. A full Emperor therefore banks 3,200 points from rank alone, before any land or research.
This lets you try a brand-new strategy every round: an all-economy Bohemia build this round, a feared warlord the next.
| Source | League points |
|---|---|
| Land | land score ÷ 10 |
| Per rank reached | 150 |
| King (rank 18), one-off | +100 |
| Emperor (rank 19), one-off | +250 |
| Per top research area held | 50 |
In the league table every one of these achievements puts a trophy behind your name: one for King, one for Emperor and one for each research area you led when the round ended. A trophy always stands for a bonus you really received, and it stays with that round forever.
 Getting Started
You begin with a full warehouse and an empty map. Your people have roofs over their heads and your stores hold gold, grain, timber and iron, but not a single farm, mine or workshop stands on your land. That is deliberate: what gets built first is your decision, and every one of the 6 factions starts from exactly the same position, so nobody begins with an advantage. Your grain feeds your people for a while, and the iron in your stores is capital: sell it at the Imperial Market and turn it into whatever you actually need.
| Stores | Amount | Land & buildings | Count |
|---|---|---|---|
 Gold Gold |
500 | House | 4 |
 Grain Grain |
900 | Wheat Farm | 7 |
 Timber Timber |
50 | Woodcutter | 1 |
 Stone Stone |
20 | Gold Mine | 1 |
 Population Population |
160 | Quarry | 1 |
 Turns Turns |
135 | Land | 14 |
| Taxes | on |
Land is simply land: every building may stand on any field. What you put on your 14 starting fields is your first real decision, and it follows from what your faction does best.
One setting comes pre-configured: your taxes start switched on. Grain needs no setting at all: every citizen eats 5 grain per turn, always, so your people consume 800 every single turn from the very first one.
Note the two numbers that matter most: your stores hold 900 grain and are not being replenished. Farms are therefore the first thing every ruler builds, and the land they stand on has to be bought first.
You do not have to work all of that out on your own. Right after choosing your faction you are asked whether you would like to be shown around. The introduction walks you through 6 steps: what sits where on the screen, buying land, selling on the Local Market, putting up buildings, setting research and watching a level tick over, and it ends with your first promotion to Serf.
While it runs, only the highlighted control can be clicked, and every change of page goes through the menu on the left, because the point is that you know your way around afterwards. You can stop at any time using the “Cancel tutorial” button in the speech bubble, and declining costs you nothing: the starting package is exactly the same either way. Nothing is handed to you that a player without the introduction would not get.
Start the introduction again. This works at any time, from any rank.
 Choosing your Faction
At the start of the round you pick one of 6 factions. Once made, the choice is binding for the whole round, but you do not have to make it right away (see You can decide later at the end of this section). Every faction grants a flat bonus added per matching building, each turn. The icon shows which good, the number is the flat bonus, and the building it applies to is named beside it.

+432 per Gold Mine

+2 per Quarry

 +2 per Coal Mine

 +2 per Iron Mine

+3 per Woodcutter

+27 per Farm
No, and that is not luck, it is arithmetic. The five resource factions get exactly half of what their building produces anyway (+50%), and the market floor prices are set so that one worker earns the same whichever good he mines. The raw numbers look wildly different, +2 stone against +432 gold, yet they are worth the same per worker.
Carinthia follows the grain rule instead. Grain is the one good every realm must consume, and a farm feeds its own workers. With the other factions only part of your people can ever stand in the bonus building, because the rest grow their food; a Carinthian can put everyone on farms. A grain bonus therefore reaches far more workers, and to be worth the same it must be smaller per building. Measured where it counts, in gold per citizen, all six factions are equal: a realm that goes all in on its faction good earns the same net gold per head, whichever crest it carries.
| Faction | Building | Bonus | Workers | Value / turn | Gold / worker |
|---|---|---|---|---|---|
| Böhmen | Gold Mine | +432 |
16 | 432 | 27,0 |
| Franken | Quarry | +2 |
16 | 432 | 27,0 |
| Sachsen | Coal Mine | +2 |
16 | 432 | 27,0 |
| Thüringen | Iron Mine | +2 |
16 | 432 | 27,0 |
| Holstein | Woodcutter | +3 |
16 | 432 | 27,0 |
| Kärnten | Farm | +27 |
16 | 162 | 10,1 |
Reading the last column: the five resource factions all land on the same gold per worker. Carinthia stands lower there on purpose, because its bonus reaches every farm you own and a farm feeds its own workers; counted per citizen, a pure Carinthian grain realm earns exactly as much as a pure Bohemian gold realm or a pure Holstein timber realm.
Where the differences really are: not in strength, but in character. Bohemia's bonus is gold and needs no buyer: safe income, but the Global Market jackpot belongs to the others. The four resource factions sell their good above the floor price whenever the market pays more; their fortune breathes with demand. Carinthia holds the one good every realm must consume: its buyers never disappear, and its farms feed more people per field, which leaves room for houses.
Figures use the market floor prices; the real price is usually above it.
Tip: specialise on the good your faction boosts, build many of that production building, and pour research into it, then trade the surplus on the global market.
Next to Choose faction the selection screen offers I will choose later. Press it and you start without a faction: your turns run, your buildings produce, you stand in the rankings and collect league points like everyone else. The one thing you are missing is the faction bonus.
You can pick your faction at any point during the round under Factions, and every card there carries its own button. From that moment the bonus applies, and the choice is binding for the rest of the round.
Waiting is not free, though: every turn without a faction is a turn without the extra half of your bonus building's output. Nobody hands that back to you afterwards.
Turns & the Turn SequenceTurns are your most precious resource. You gain one automatically every 2 minutes 40 seconds, even offline. You can bank at most 540 turns (= exactly 24 hours, 540 turns a day). When you press End turn, time is simulated; you may end up to 10 turns at once.
Every ended turn runs these steps strictly in order. Each step changes the population and resources the next step reads, so the order is not cosmetic, it is the mechanic.
Because production comes before payday, gold you mine this turn does pay this turn's upkeep, and so does whatever your standing orders sold. Wheat is the other way round: what you harvest this turn only feeds your people next turn.
Because eating comes before anyone moves in, newcomers never eat in the turn they arrive; they start eating the turn after. That is why the consumption figures in your top bar are exact: what it says before you end the turn is what the turn actually costs you.
PopulationYour population are your workers, soldiers and taxpayers all at once. Three forces move it every turn: births and deaths, tax migration, and the housing cap, applied in that order, all of them after your people have eaten and drunk.
Births & deaths depend on whether your people are fed (see Food): well-fed they see 5% births and 3% deaths per turn and grow slowly on their own; when starving, growth stops and deaths spike.
Taxes move people too: with taxes on, about 2% of your population moves in each turn; with taxes off, about 12% (see Taxes).
Housing is a hard ceiling. Each house holds 50 people; if your population ever exceeds your housing, everyone without a roof leaves that same turn. Watch the "free housing" figure in the top bar; if it turns red, build houses fast.
TaxesTaxes know only two settings, on or off, and you switch between them any time on the tax page. They start switched on.
Newcomers need room. Anyone beyond your housing leaves again in the same turn, so switching taxes off pays only while empty houses are waiting. Build houses first, switch taxes off until they are full, then switch them back on.
Food & BeerWheat keeps your people alive. Every citizen eats 5 wheat per turn, always and in every realm; there is nothing to set. A well-fed people sees about 5% births and 3% deaths per turn, so it grows slowly on its own. If you want more people faster, build houses and switch your taxes off for a while; immigration does what the dinner table does not.
Starvation is all-or-nothing: if you're even one wheat short of feeding everyone, the whole population goes hungry that turn: births drop to 0%, deaths jump to 20%, and many die. Always keep a comfortable wheat surplus.
Beer becomes a real need once your city passes 5,000 citizens: from then on your people drink 1 beer for every 20 citizens each turn, exactly the demand shown in your resource bar. It's checked every turn, just like wheat. If your stores run dry, the unhappy citizens start packing up: about 15% of the population flees that turn. Switching taxes off does not make up for that: the extra newcomers are fewer than the ones who leave. Below 5,000 citizens beer is pure trade goods and nobody misses it, but once you grow past that mark, keep a brewery running so the taps never go dry.
 Infrastructure
Land and buildings live on one page in the game, and they are one chapter here. First the ground, then what stands on it.
Every building needs a plot, and any building may stand on any field. Land is land: one kind, base price 225 gold, worth  1 per field.
The price of every new field climbs ever more steeply with your total land. Each field in an order is priced at the holdings you have reached by then, so the second field already costs more than the first. Buying ten fields at once therefore costs exactly what ten single purchases cost, and there is no cap on how many you may take in one go: your gold is the only limit. A Peat Hut and a Dike each shave 5% off the price, the Trading Post 10%.
Building costs are flat: the same price for each one you build, no scaling with how many you own. Each building occupies 1 plot. Workers are needed to operate a building, not to build it, and there is no per-turn build cap; only land and resources limit you.
After a successful order you are told the total cost of the whole batch, not the price of a single building. If an order fails for want of resources, you are told exactly what is missing and how much, and a single click takes you to the Global Market, which names exactly those missing amounts.
| Building | |
|
|
 |
Produces / Consumes |
|---|---|---|---|---|---|
 Farm Farm |
4.608 | 16 | 0 | 16 | 144 |
 Brewery Brewery |
3.744 | 16 | 4 | 16 |  12 −48 12 −48 |
 House House |
500 | 5 | 0 | 0 | 50 |
 Laboratory Laboratory |
2.808 | 12 | 3 | 16 |  8 8 |
 Woodcutter Woodcutter |
4.752 | 15 | 0 | 16 | 6 |
 Gold Mine Gold Mine |
4.608 | 16 | 0 | 16 | 864 |
 Quarry Quarry |
4.032 | 20 | 0 | 16 | 4 |
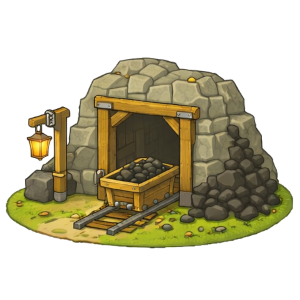 Coal Mine Coal Mine |
4.608 | 16 | 0 | 16 | 4 |
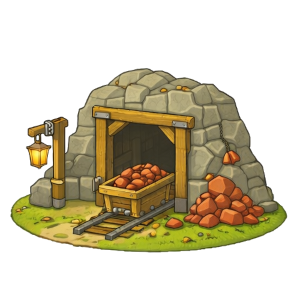 Iron Mine Iron Mine |
4.608 | 16 | 0 | 16 | 4 |
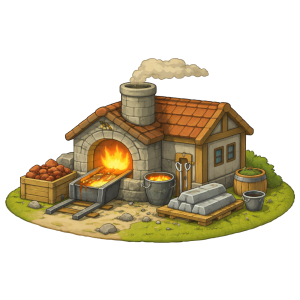 Blacksmith Blacksmith |
4.680 | 20 | 5 | 20 |  2 −2 −2 2 −2 −2 |
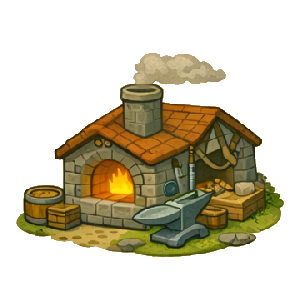 Weaponsmith Weaponsmith |
4.680 | 20 | 5 | 20 |  2 −2 −2 −2 2 −2 −2 −2 |
 Horse Farm Horse Farm |
2.448 | 10 | 2 | 10 |  2 −8 2 −8 |
 Barracks Barracks |
4.000 | 100 | 20 | 0 |  12 12 |
 Castle Castle |
75.000 | 400 | 2000 | 0 |  400 50 400 50 |
Two capacities come from buildings: each house gives 50 housing, and your barracks (12 each) plus castles (50 each) decide how many soldiers you can hold. A castle also defends with 400 in battle and costs no upkeep. That figure is a base value: your castle research raises it by its full percentage, and the City Wall multiplies the result once more by +20%, and that happens after the research, so it is always exactly +20% on every castle wall. Your troops are not touched by either; they have their own research. The buildings page shows you the finished number.
Production Chains & WorkersEvery citizen is a worker. Buildings are staffed in a fixed priority order each turn; if workers run out, later buildings (labs first to suffer) simply produce nothing that turn.
How much a building makes: (base output + faction bonus) × research multiplier × special-building factors, per active building. Research adds +1% per level for that good; every special building then multiplies the result on top at the very end: the Well (+5%) on wheat, the Sawmill (+5%), Water Plant (+10%), Marketplace (+5%), Bridge (+10%) and Harbour (+20%) on all base resources. No matter how far you have researched, each building always delivers exactly the percentage on its card. Beer, horses, iron and weapons get neither research nor these boosts: they are made from inputs, and their consumption follows their actual output.
Production chains turn raw goods into finished ones: breweries eat wheat → beer, charcoal kilns burn wood → coal, blacksmiths consume coal + iron ore → iron, weaponsmiths need wood + coal + iron → weapons, and horse farms feed wheat → horses. If a building lacks its inputs it simply makes nothing that turn, and it never goes negative.
ResearchThere are 9 research areas. Labs generate research points, and you split them across the areas in steps of 10%, for example 10% wheat, 30% gold and 60% castles. Together the shares always make exactly 100%. Each level gives a bonus.
Only what comes out of the ground can be researched: wheat, wood, stone, coal, iron ore and gold, plus taxes, your units and your castles. Beer, horses, iron and weapons are made from inputs: raising their output would raise their consumption by exactly as much, so a percentage there would create nothing. For the same reason the production boosts of the special buildings apply to base resources only.
Warning: as long as you have not set a distribution, lab points are still generated but added to nothing, so they are lost. Set your shares on the research page and save them.
Each level costs more than the last, and the gap widens as you climb. The formula is cost of level n = 100 + 2 × (n−1)², so 100, 102, 108, 118, … points. That shape is deliberate: the first levels fall within minutes, while the high ones stay worth chasing all round, because doubling your research level takes roughly eight times the points, so labs keep paying off instead of hitting a wall.
What counts is always the total collected in that area, not the last step alone: level 10 needs 1,570 points in total, level 25 already 12,300, and level 50 a full 85,850. The step from 49 to 50 alone costs 4,902. At 8 points per lab per turn that is roughly 430 turns with 25 labs.
Every level adds +1% to that area's effect: more production, more tax income, stronger troops or thicker walls. Unit research boosts attack and defence of your whole army, whether you attack or defend. Castle research boosts only the wall strength of your castles. One research never raises both; whoever wants to strike hard and sit safe has to pay for two. Research is open-ended: there is no maximum level.
Labs generate 8 points each per turn (Schwaben adds more), and the Alchemist (+5%), Academy (+10%) and University (+20%) each multiply lab output on top, together roughly +39%. Since labs are staffed last, keep a healthy worker surplus if you want to research fast.
 Military
Three unit types. Training costs are flat per unit; recruits consume population and arrive after their training time (in turns). Every unit then costs gold upkeep every turn.
| Unit |  |
|
|
|
|
|
|
|
|
Train |
Upkeep |
|---|---|---|---|---|---|---|---|---|---|---|---|
 Warriors Warriors |
4 | 20 | 0.00333 | 0.5 | 1.000 | 2 | 1 | 0 | 0 | 2 turns | 175 |
 Horsemen Horsemen |
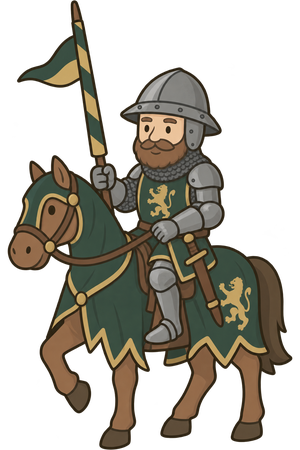
12 | 25 | 0.02 | 1.4 | 5.000 | 6 | 3 | 0 | 1 | 5 turns | 350 |
 Bombards Bombards |
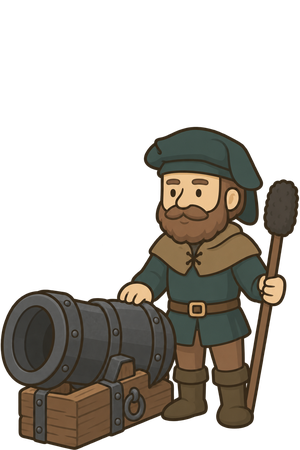
80 | 60 | 0 | 12.5 | 30.000 | 10 | 5 | 10 | 4 | 7 turns | 600 |
Upkeep & desertion: every turn each unit draws its gold upkeep, paid at the very end of the turn — after production and after your standing orders have sold. If you can't pay, units desert (infantry first, then cavalry, then artillery) until you can afford the rest; the same happens if you hold more troops than soldier room. Deserters are gone for good.
Dismissing a unit gives back its population and half its weapons, but no gold, iron or horses. Cavalry needs a horse to train, artillery needs iron and horses. Building the Palace hands you a one-time batch of free mercenaries that fills your empty soldier room, split into 40 % infantry, 35 % cavalry and 25 % artillery. That is deliberately a campaign-ready force rather than sheer mass: without artillery every wall would stay standing. So build your barracks first, then the palace, because only empty room is filled. The Tavern gives no mercenaries; it makes your troops +20% stronger, see Special buildings.
War & CombatEvery battle plays out in three acts: the field battle, then the siege, then the storm. The result is calculated, not rolled: there is no luck. A smaller, well-led, well-researched army beats a big careless one.
Research wins wars. In battle two research areas count, and they never overlap. Your unit research lifts attack and defence of your entire army, with no upper limit: at 50 levels every soldier fights at 1.5× strength, at 100 levels at double, and so on. Your castle research thickens only your castle walls. An attacker therefore needs unit research, a defender who wants to hold his walls needs castle research, and anyone who wants both pays twice.
The mix matters just as much. Each of the three arms does something the others cannot:
| Unit | Its role | What it cannot do |
|---|---|---|
| Infantry |
The shield and the fist of the army. Wins the field battle and storms the breach. And because cannon fire comes down by head count, every cheap footman draws fire away from your expensive riders and guns. | Carries hardly any land himself: that is what the riders are for. |
| Cavalry |
The land-taker. Every rider claims 6× as much ground as a footman; almost all the land you win rides home in the saddle. | Poor value in a fight, and every fallen rider costs you the land he would have carried. |
| Artillery |
The only thing that breaks castle walls. Without it you take nothing from anyone who owns a single castle. Each castle takes about 5 guns to breach (with your unit research against his castle research at the same level), so against a castle-rich defender the guns are the biggest item in your army. | Claims no land at all: guns break walls, they do not hold ground. |
Only two of those are actually mandatory, and it pays to know the difference between "must" and "is smarter":
Everything beyond that is not a rule but a calculation. A rider carries 6× as much ground as a footman, but also costs 2.8× the points, so per point, cavalry brings home about 2.1× as much land. In exchange it puts far fewer bodies into the battle beforehand, and that battle has to be won first; per point, infantry is by far the cheaper way to win it. So infantry wins the field, cavalry carries the land, and how much of each you need depends on the enemy: a strong defender calls for plenty of foot, a small raid on a weak one for more horse. And if you plan a whole string of campaigns with the same army, the footmen earn their pay twice over: cannon fire strikes by head count, cheap infantry soaks it up, and every rider who lives through one war carries land again in the next. A pure rider army shines in its first battle and is ground down after a few. There is no single right ratio, which is exactly why it pays to run the simulator first.
So a combined force is not the only way, it is the cheapest one. Infantry wins the field and shields the rest, guns open the walls (the more castles, the more of them), and cavalry carries the ground. The free mercenaries from Tavern and Palace come as exactly such a ready-mixed, campaign-worthy force: a sound army to start with, not a formula. Leaving an arm out does not lose you the campaign by itself, it just makes you pay more for the same patch of land.
The defender's field army marches out to meet you. First both sides' cannon open fire, then the cavalry clash on the flanks, and finally the infantry lines collide.
A cannon always fires at full force, in the open field just as later before a wall. Its damage comes down on the whole enemy army by head count, never aimed at one particular arm. Bringing plenty of infantry therefore shields your own guns: only a fraction of the fire lands on them, and a gun takes three times the punishment a footman does. No barrage ever fells more than 50 % of an army. Guns soften the enemy, but the clash of the lines always follows, and whoever attacks bleeds too.
How many men you lose depends solely on his attack strength. Each side loses the share that the enemy's attack achieves against its own defence, which is enemy attack divided by your own defence. A defender with 6,400 attack strength therefore costs you the same 320 infantry whether you march up with 8,000 men or 40,000. A bigger army does not make your losses smaller, only less significant.
When the dust settles, two things are checked, in this order:
If you win the field and the defender has castles, his survivors try to flee inside. How many make it depends on cavalry in the same way. With no castle to flee to, every survivor is cut down, and with no castle in his realm at all, the won field alone hands you his land.
Now your artillery pounds the walls, and this is where campaigns are decided. A wall is always equally solid: an empty castle is exactly as hard to breach as a fully manned one. Only the stone counts here, so a castle always costs the same weight of guns.
Each castle defends with 400, and the defender's castle research and city wall raise the whole figure by their percentage; your own unit research and tavern raise the punch of every gun in return. A gun strikes for 80, so as a rule of thumb:
Every wall must fall. If a single castle still stands when the bombardment ends, no field changes hands; see Act 3.
You always shoot anyway, even when it is not enough. Your fire is spread across the walls: if it suffices for seven castles out of ten, seven wall rings collapse and three stay standing. It costs you not a single man, because the garrison only fires back once you actually storm. But you only get to learn any of this if the campaign ends in captured land. If the attack takes no ground, the report names neither the wall rings that fell nor the ones that held – you will not know whether you were five cannons short or five hundred.
There are no ladders. An intact wall cannot be climbed, at any price. The only way into a realm is through a breach your artillery has opened, which is why an empty castle protects just as well as a manned one. A castle you cannot garrison is still a castle the enemy must shoot to pieces.
Once the breach is open, your infantry and cavalry go in. What decides the assault is your storm strength against the garrison, the troops that fled behind the walls. The masonry no longer counts; it has already done its work by making you bring the guns.
A hopeless assault is not attempted. If the garrison behind the breach is stronger than your storming force, your commander does not send his men into the streets. He withdraws with the army intact, and without land. That is a defeat, but a cheap one.
If your storm strength prevails, the castles fall and the land changes hands. The garrison is not put to the sword to the last man: a share surrenders or slips out through a postern gate and stays with the defender. Losing a battle costs you your army, but no longer every last man of it.
Land changes hands under exactly one condition: every wall breached and the storm won, or the defender owned no castle at all, in which case winning the field is enough.
How much land you take is set by your surviving infantry and cavalry. Each footman claims a small patch, each rider 6× as much. Artillery claims nothing. The riders are the minority of your host, but they carry the lion’s share of the land; that is what horsemen are for.
Conquest is deliberately gradual: even a crushing victory shifts only a portion of a realm in one attack. You won't wipe anyone out in a single blow. And if your victim is under defence protection, your land haul shrinks accordingly; see When you are attacked.
A large realm has an easy time against a small one: more land means more economy, more economy means more army. So that picking on the small stops paying, the land difference decides how much of your possible haul actually reaches home.
| Your land | Target's land | Difference | You conquer |
|---|---|---|---|
| 2,500 | 5,000 | 50% | one and a half times as much |
| 5,000 | 5,000 | 0% | exactly what your survivors can carry |
| 10,000 | 5,000 | 50% | half of it |
| 25,000 | 5,000 | 80% | a fifth |
| 100,000 | 5,000 | 95% | next to nothing |
The balance is not capped: fall upon a minnow with a hundred times his land and you will take practically no field at all, and the campaign costs you nothing but troops. The other way round, punching upwards is the most rewarding battle in the game, if you win it.
The land counted is what both sides own at the moment of arrival, not at the moment of marching. Both figures are public in the ranking, and the battle simulator has a field for each of them.
All of these are defeats. It is worth knowing them before you march, not after:
| What happened | What was missing |
|---|---|
| Beaten in the field | Too small an army, or too little unit research. |
| Field won, walls held | Too little artillery for the number of castles. |
| Field won, some walls held | Too little artillery, so part of the castles fell, but not all. |
| Breach open, no assault risked | Too few assault troops left, infantry and cavalry together, against the garrison. |
| Storm won, no land | Too few surviving infantry and cavalry to hold ground, or the defender was under full defence protection. |
A battle report is not a bird's-eye view of the enemy realm. It is the reward of victory, and it has only one condition:
There are therefore exactly two reports, and nothing in between:
| Outcome of the campaign | What you learn |
|---|---|
| No land captured | Your own army and what it cost. About him: nothing. |
| Land captured | Everything: his army before and after the battle, his castles, his defence protection, the land you took and the buildings that changed hands with it. |
This finishes the scouting raid. An army deliberately too small to take land used to come home and bring half the enemy realm back as knowledge. Today reconnaissance costs exactly as much as a victory: whoever only wants a look pays with his soldiers and learns nothing all the same.
Even the headline of your report stays silent. Whether your army failed at the field battle or only at the last wall is not written there, because that alone would reveal whether the enemy holds castles at all. Without land you read only that your army is back and brings none with it.
And because a failure teaches you nothing, the second attack is as blind as the first. What you know about someone before a war is what the score list says: his points and his land. Whether those points sit in castles, in a field army or in research, nobody will tell you.
And even the report that does bring land quotes no hard attack and defence values, only how the balance of forces stood: hopelessly outmatched, at a disadvantage, evenly matched, at an advantage or overwhelmingly superior. From two exact numbers the enemy's entire composition, research included, could otherwise be worked backwards.
The battle simulator still shows you every number to the digit, because there you type the enemy's values in yourself. It runs on exactly the same combat machinery as real war, so you can safely play through what an attack would cost.
When you are attackedBeing attacked is part of the game. But losing does not mean losing everything, and two rules make sure a realm survives a bad day: defence protection and proportional loss.
Without it an enemy could farm you attack after attack while you sleep. So: every attack that really takes land from you raises your defence protection by 10 points for every percent of your realm that changed hands, up to a maximum of 100%. Lose a tenth of your land in one attack and you gain 100 points of protection.
| Land lost in that attack | Protection gained | Attacks until 100% | Your units & castles then defend |
|---|---|---|---|
| 1% of your realm | 10 points | 10 | +10% stronger per attack |
| 3% of your realm | 30 points | 4 | +30% stronger per attack |
| 5% of your realm | 50 points | 2 | +50% stronger per attack |
| 10% of your realm | 100 points | 1 | +100% stronger per attack |
| 25% of your realm | 100 points | 1 | +100% stronger per attack |
The protection applies to everything that defends: infantry, cavalry, artillery and the walls of your castles. At the same time the attacker's land haul shrinks by the same percentage: at full protection he may still win every act of the battle and still go home with nothing, which counts as a defeat for him.
Where you see it: In the ranking a  clock with the percentage appears behind the name of every protected player. Hover over it to see how high the protection is and when it expires. Your own protection additionally shows in the realm box at the top right. Check this before you attack, because a target at 100% protection is not worth the troops.
Defence protection has one flaw: it also shields the man who is doing the raiding. Whoever sits at 100% because he was plundered can attack freely for those hours, and his victims run into a doubled wall. Revenge closes that door.
Whoever really takes land from you gives you a claim against him. It lasts 24 hours and does exactly one thing: attack him within that time and his defence protection does not count, neither the bonus to his defence nor the cut to your haul. He defends with his own troops, his own castles and his own research, and nothing else.
Your open claims are listed on the war page with a running clock; click a name and it goes straight into the target field. Two details are worth knowing: the claim is checked on arrival, not when you set out, so a march started minutes before the deadline can arrive too late. And a campaign of revenge does not hand your opponent a fresh claim in return, otherwise two neighbours would keep the protection switched off between them forever.
If you lose land, you never lose it all at once, and no single attack strips you one-sidedly.
Buildings stand on the land you lose, and they go proportionally: lose a fifth of your land and you lose a fifth of your buildings, from every kind alike. Unbuilt land is no shield: a buffer of empty fields no longer keeps your buildings safe.
And they are not razed, they change owner. Every building that leaves with the land stands in your attacker's realm the next morning, castles included. That cuts both ways: a won campaign hands you a working economy, a lost one hands yours to someone else.
And your army? It no longer falls as one. How many get away depends on how narrowly you lost: lose by a hair and you keep almost everything, be overrun and almost nothing. Your own cavalry covers the retreat, the attacker's turns it into a hunt, the same calculation that applies to the attacker when he loses the field battle. Castles are no longer a condition: without them your men fall back into the countryside instead of being cut down.
This holds for the defender only. Whoever sets out on a campaign carries the full risk and can lose his army to the last man; attacking is dearer than defending, and that is intended.
| Building | Before | Lost | After |
|---|---|---|---|
| Farms | 100 | 10 | 90 |
| Houses | 50 | 5 | 45 |
| Castles | 100 | 10 | 90 |
This also changes how you plan your defence: castles are a lasting investment, not a consumable that one big attack wipes out. They are tied to your land: as long as you hold your land, you hold your castles.
Far less than you fear. He learns anything at all only if he takes land from you. Beat his attack off – in the field, at the wall or in the storm – and he gets nothing: not your troops, not your castles, not even whether you have any. His report tells him only that he captured no land, and what the attempt cost him.
That makes the scouting raid against you pointless: whoever sends a small army to measure your defence loses it and knows exactly as much afterwards as before. Whoever wants to attack you in earnest has to send blindly, and send enough. The full breakdown is in the chapter War & Combat.
Your own battle report, on the other hand, always arrives complete, it is your realm, after all.
 Trade
TradeThere are two markets. The Local Market is the bank: it buys any good from you instantly, always at the minimum price: safe gold, but little. The Global Market is where players trade with players: you list your goods at your own price and buy from other players' offers, or you use the buy requests, where players are looking for goods and have already deposited the gold for them. Gold is the currency and cannot be traded.
| Good | Minimum price |
|---|---|
| Wheat |
6 |
| Beer |
96 |
| Wood |
144 |
| Stone |
216 |
| Iron ore |
216 |
| Coal |
216 |
| Horses |
294 |
| Iron |
972 |
| Weapons |
1.863 |
One table, one amount field per good, one Sell button. You always receive the minimum price from the table above, instantly and with no duty. The goods go to the bank and leave the game. Whatever you produce is therefore never worthless: this base value is guaranteed at all times. The local market only buys; if you want to buy goods yourself, you do that on the Global Market.
Most of what a realm produces is sold on the local market turn after turn. The Standing orders tab does that for you: enter an amount per turn for a good and every turn sells exactly that much at the minimum price, automatically and without a single click.
The order is executed right after production: it sells what this turn has just brought in, not what was lying around at the start of it. Is there less in stock than the order asks for? Then whatever is available goes, and an order never runs into debt.
What an order brought in is shown after every turn in the overview, exactly like any other item: the goods leaving under their own name, the gold under gold. An empty amount deletes the order.
Every offer on the Global Market comes from a real player: “5,000 wood at 260 gold per unit”. Pick a good in the filter to see all its offers, sorted by cheapest unit price or largest amount. You may buy an offer in part: enter an amount, or leave the field empty to buy all of it. The seller receives the proceeds immediately; a market duty of 3% is charged on purchases only.
To sell, list an offer of your own: amount, gold per unit, done. The goods move out of your storage into the offer (so you cannot spend them twice) and come straight back if you withdraw the offer. The minimum asking price is the local minimum price, because anything below that the bank pays you anyway.
One position per good. Each player holds at most one offer per good, so nobody can flood the wood list with ten different prices. Listing again simply adds to what you already have, and the unit price you enter then applies to the whole position, old amount included (the page asks you first). That is also how you change your mind about a price: enter the new price, leave the amount empty. To make a position smaller, withdraw it and list again; withdrawing costs nothing, everything comes straight back.
Is that price good or bad? You do not need to know by heart. Every offer carries a rating against the normal price (twice the minimum price, roughly what producing the good yourself costs an unspecialised player): green means cheaper than normal, a bargain; red means above normal. The further from zero, the stronger the signal.
The price of a good is the cheapest offer currently on the Global Market, the price you can actually buy at right now. If there is no offer at the moment, the last known price remains. The percentage next to it, and the price bar below your resources, show exactly the same figure as the rating in the list: how far that cheapest offer sits from the normal price. Clicking a good opens its price history, where every change of the cheapest offer is a point on the curve. The trade log below the market lists every deal, anonymously: what was traded and at what price, never by whom.
A buy request is an offer with the roles swapped: instead of goods, you put down gold. “I will take 1,000 weapons at 1,900 gold each.” The full sum plus the market duty is deposited the moment you list it, and that is what makes the request trustworthy: anyone who delivers has the gold in the same instant, with no duty of their own to pay.
Anyone holding the good sells straight into your request, in part if they like: deliver 100 of the 1,000 weapons and the request keeps looking for the remaining 900. Withdraw it and you get everything back for the amount still open, duty included, and in the end you only pay for what actually arrived. One position per good applies here too, and changing the price works exactly as it does for an offer: the deposit is merely recalculated: you pay the difference at most, and lowering it gives gold back including the duty share. You never pay the market duty twice.
Buy requests are the fastest way to sell: no waiting for a buyer to notice your offer. Watch the rating there, it is coloured the other way round, because now you are the seller: green means the request pays more than the normal price.
If you are short of resources while building, the buildings page brings you to the Global Market with a note listing exactly what is missing. Whoever needs gold quickly sells to the Local Market; whoever wants a fair price lists an offer and lets the players decide.
 Special Buildings
Each special building is unique (one per empire) and a one-off flat purchase. Every percentage bonus is applied on top at the very end, after research, as its own factor. No matter how far you have researched, each building always delivers exactly the percentage listed here, and same-type buildings multiply with each other. Every special building you own also raises your rank by one (see Ranks).
| Building | |
|
|
|
Effect |
|---|---|---|---|---|---|
| Well | 10.000 | 11 | 5 | 0 | +5% production (base resources), on top |
| Pharmacy | 18.300 | 20 | 10 | 0 | +5% tax income, on top |
| Peat Hut | 33.600 | 37 | 18 | 0 | −5% land price |
| Church | 61.700 | 67 | 34 | 0 | +10% tax income, on top |
| Sawmill | 113.100 | 123 | 62 | 0 | +5% production (base resources), on top |
| Alchemist | 380.300 | 415 | 207 | 3 | +5% research speed, on top |
| Trading Post | 697.400 | 761 | 380 | 5 | −10% land price |
| Police | 1.278.900 | 1.395 | 698 | 9 | +10% tax income, on top |
| Market | 2.345.200 | 2.557 | 1.279 | 17 | +5% production (base resources), on top |
| Dike | 4.300.700 | 4.690 | 2.346 | 31 | −5% land price |
| Water Plant | 7.886.600 | 8.600 | 4.303 | 57 | +10% production (base resources), on top |
| Bridge | 14.462.400 | 15.771 | 7.890 | 105 | +10% production (base resources), on top |
| Academy | 26.521.300 | 28.922 | 14.469 | 193 | +10% research speed, on top |
| Harbor | 48.635.000 | 53.037 | 26.533 | 354 | +20% production (base resources), on top |
| Tavern | 89.187.100 | 97.260 | 48.656 | 649 | +20% unit strength (attack & defence), after unit research |
| City Wall | 89.187.100 | 97.260 | 48.656 | 649 | +20% castle wall strength, after castle research |
| University | 163.551.900 | 178.355 | 89.226 | 1.189 | +20% research speed, on top |
| Cathedral | 299.922.600 | 327.069 | 163.624 | 2.181 | +100% tax income, on top |
| Palace | 550.000.000 | 599.782 | 300.055 | 4.000 | one-time mercenaries on build |
 Ranks
RanksYour rank ladder runs from Beggar (rank 0) up to Emperor (rank 19). Two things must come together for every rank: enough special buildings and enough land.
Your rank is the weaker of the two. Own nine special buildings but only the land for rank eight, and you are rank eight, and you advance the moment the land arrives, without building anything else.
How many special buildings you may own is a single blunt number: your rank plus one. At rank eight you may own nine, exactly one in advance. The tenth waits until rank nine is actually reached. Land is not checked a second time when you build; it is already part of the rank.
A rank you have reached is yours forever and can never be taken from you. The highest rank you ever held is recorded, so losing land later never costs you a rank. That is why you can finish the round as Emperor even if your land has since fallen below the 32.000 that the Emperor rank demands: you held it once, and that is enough.
| Rank | Land needed |
Special building |
League points (from rank) |
Total (locked in) |
|---|---|---|---|---|
| 0 · Beggar | starting rank | - | - | 0 |
| 1 · Serf | 30 | one special building |
+150 | 150 |
| 2 · Servant | 70 | one special building |
+150 | 300 |
| 3 · Freeman | 120 | one special building |
+150 | 450 |
| 4 · Citizen | 200 | one special building |
+150 | 600 |
| 5 · Peddler | 350 | one special building |
+150 | 750 |
| 6 · Merchant | 600 | one special building |
+150 | 900 |
| 7 · Patrician | 1.000 | one special building |
+150 | 1.050 |
| 8 · Baron | 1.500 | one special building |
+150 | 1.200 |
| 9 · Count | 2.200 | one special building |
+150 | 1.350 |
| 10 · Prince | 3.200 | one special building |
+150 | 1.500 |
| 11 · Margrave | 4.500 | one special building |
+150 | 1.650 |
| 12 · Count Palatine | 6.000 | one special building |
+150 | 1.800 |
| 13 · Landgrave | 8.000 | one special building |
+150 | 1.950 |
| 14 · Duke | 10.500 | one special building |
+150 | 2.100 |
| 15 · Elector | 13.500 | one special building |
+150 | 2.250 |
| 16 · Grand Duke | 17.000 | one special building |
+150 | 2.400 |
| 17 · Archduke | 21.000 | one special building |
+150 | 2.550 |
| 18 · King | 26.000 | one special building |
+150 +100 bonus | 2.800 |
| 19 · Emperor |
32.000 | one special building |
+150 +250 bonus | 3.200 |
PointsThere are two different point systems, and they are not the same thing:
Your in-game score adds up everything you own: land, units (artillery most, then cavalry, then infantry), each castle, and every research level you hold. Highest first, total land breaks ties.
| Source | Points each |
|---|---|
| Land (per field) | 1 |
| Warriors | 0.5 |
| Horsemen | 1.4 |
| Bombards | 12.5 |
| Castle | 30 |
| Research (per level held) | 5 |
| Source | League points |
|---|---|
| Per rank reached | 150 |
| King milestone (rank 18) | +100 |
| Emperor milestone (rank 19) | +250 |
| Per research area you lead | 50 |
| Land | score ÷ 10 |
 Alliances